Administrator Manual
Introduction
This Administrator Manual provides a comprehensive guide for setting up Tenant ID with Payment Locks and managing user roles within your organization. As businesses increasingly rely on digital assets and services, securing and streamlining access to these resources becomes paramount. This guide outlines the process of integrating your company's Tenant ID with Payment Locks, a crucial step for enabling secure asset borrowing and management through Azure Portal. It covers everything from logging into the Azure Portal and locating your Tenant ID, to sending this information to Payment Locks and assigning user roles within the Microsoft Entra Admin Center. Whether you're an IT administrator or a manager responsible for asset oversight, these instructions are designed to ensure a smooth setup process and efficient management of your digital environment.
How to Set Up Tenant ID with Payment Locks
1. Logon to Azure Portal
- Go to Azure Portal.
- Navigate to your Company's name, then to Overview.
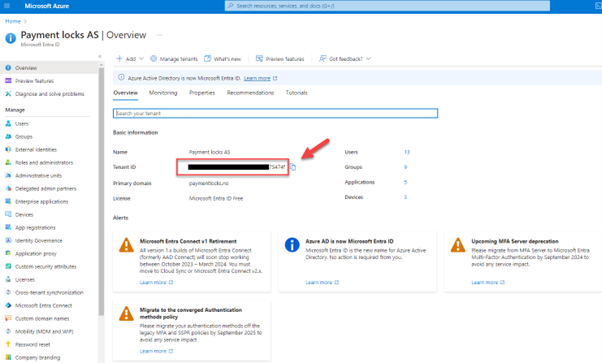
2. Locate and Copy Tenant ID
- Find the Tenant ID section and copy the ID.
3. Send ID to Payment Locks Contact
- Email the copied Tenant ID to the contact person at Payment Locks.
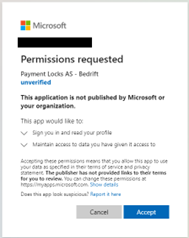
4. Accept Company & Tenant ID on Payment Locks
- Once Payment Locks confirms registration of your company and Tenant ID, log in to Payment Locks Portal with an Azure AD administrator user in your company and click accept.
5. User and Asset Manager Roles
- All users that are members of the Tenant can login using their company credentials.
- Payment Locks portal roles need to be added manually.
Set Payment Locks User Roles
Important: Ensure Tenant ID is registered with Payment Locks before proceeding.
1. Sign In to Microsoft Entra Admin Center
- Navigate to the Microsoft Entra admin center.
- Log in using your administrator credentials.
2. Switch Tenant (If Applicable)
- If you have access to multiple tenants, click on the "Manage Tenants" Settings icon in the top menu.
- Select the appropriate tenant from the 'Organization' menu.
3. Navigate to Enterprise Applications
- Select 'Enterprise applications' from the sidebar.
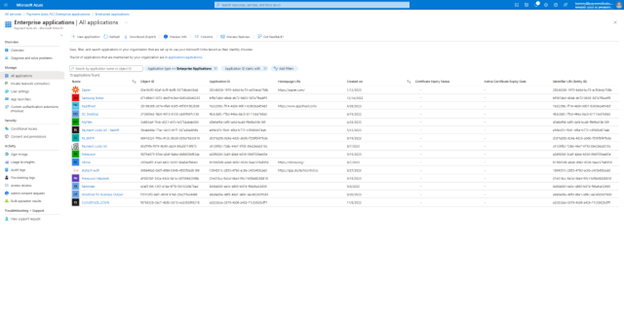
4. Locate "Payment Locks AS" Enterprise Application
- Click on 'All applications' from the sidebar to see a list of all applications.
- Use the filters or scroll through the list to find "Payment Locks AS" if it is not immediately visible.
5. Select "Payment Locks AS"
- Click on the Payment Locks AS application where you want to assign roles.
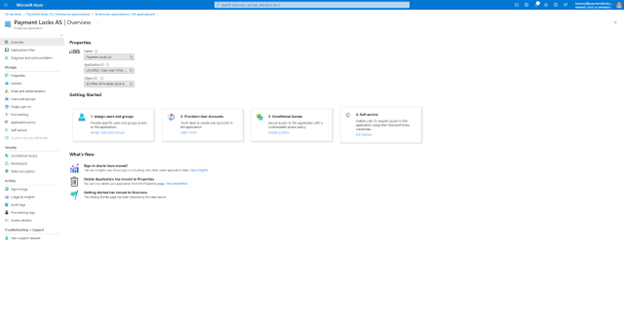
6. Manage Users and Groups
- Under the 'Manage' section, select 'Users and groups'.
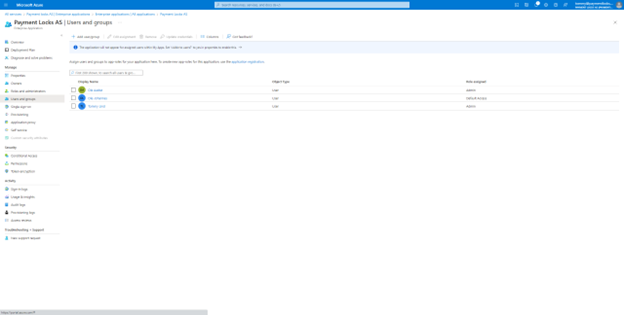
7. Add User Assignment
- Click on 'Add user/group' to open the 'Add Assignment' pane.
8. Choose Users and Groups
- In the 'Add Assignment' pane, click on 'None Selected' under the 'Users and groups' selector.
- A list of company users and security groups will be displayed.
- Search for and select the desired users and/or groups. Multiple entities can be selected.
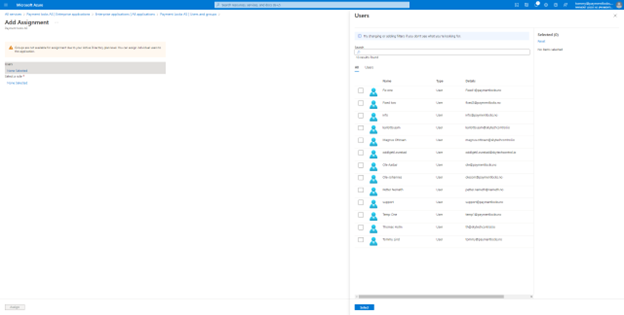
9. Proceed with Selection
- After making your selections, click the 'Select' button to continue.
10. Select a Role
- Click on 'None Selected' under 'Select a role' in the 'Add assignment' pane.
- A list of roles defined for the application will be displayed.
- Select the role “Admin”.
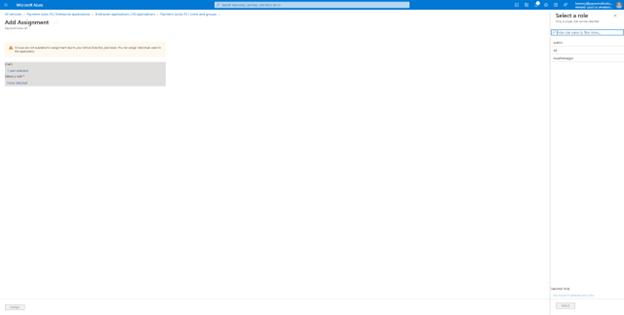
11. Finalize Assignment
- Click the 'Select' button after choosing a role.
- Finally, click on the 'Assign' button to complete the assignment process.